CONVERTING FS2004 AIRCRAFT TO FSX TUTORIAL
TABLE OF CONTENTS
Introduction and Downloads
Part 1: Setup
Part 2: Saving and Animating the Props
Part 3: FS2004 Import
Part 4: Setting Up Landing and Taxi Lights
Part 5: Conversion to FSX
Part 6: Editing Materials and Textures
Part 7: VC & Appendix
PART FIVE - CONVERSION TO FSX AND SETTING VISIBILITIES
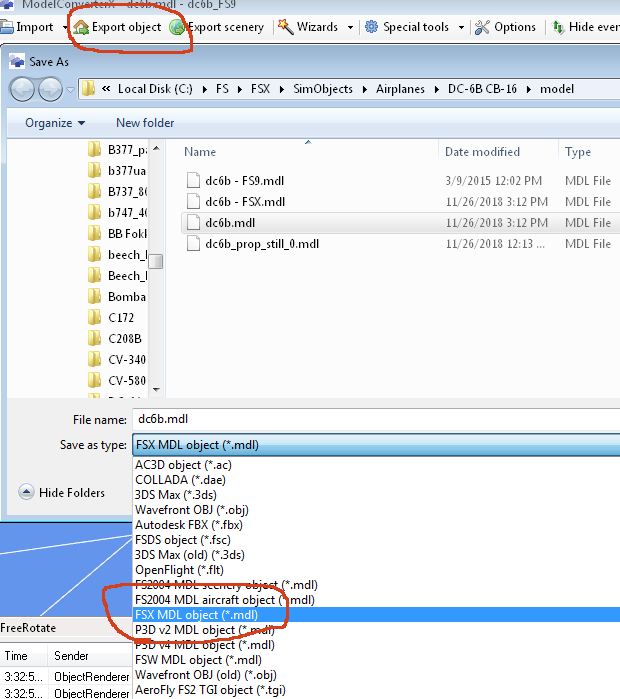
1. Choose Export Object (menu) and change the drop down box to FSX MDL Object
(or another MDL format if exporting to another sim). Click on the
MDL filename, in the example it's dc6b.mdl. Click the
Save button. An overwrite warning will appear. As long as
you have made the FS9 backup of your MDL file, click the Yes button.
A red error line may appear in the log saying that this is not a
supported MDL type. This has never caused a problem for me.
Don't worry about the other MDL files in the image below.
2. You should see a yellow box appear on the screen detailing things you should have thought of when reading the LEGAL RAMIFICATIONS section in the Introduction of this tutorial.
3.
If you do not get a new MDL created (check the Modified Date in Windows
Explorer/My Computer) or an error message, then it is likely your
compile process is not working correctly. This will need to be
fixed before you can continue (see the LIMITATIONS section in Part 1).
4. Import the new FSX version of your MDL file into MCX. In our example it is still called dc6b.mdl.
5.
Use the animation slider to check all parts and make sure that
they are located where they should and animating correctly. If
there is a problem here, I don't know how to solve that, sorry.
6.
Click the Object Information button. Look at the
Boundingbox section. Find the largest dimension (negative or
positive).

In this DC-6B example, the largest dimension is -19.501.
7. Click the Edit box and change the Name to include your sim. I changed this to dc6b_FSX. Click the Edit button again. Close the Object Information box.
8. Choose Export Object (menu) and check the drop down box is set to FSX MDL Object
(or another MDL format if exporting to another sim). Click the
Save button. An overwrite warning will appear. Click the Yes button.
9. If the values of the bounding box in step 6 are reasonable
(i.e. around 10-30 meters) then skip to step 14. If you chose to
use RADItor to change the bounding box size, then go to step 11.
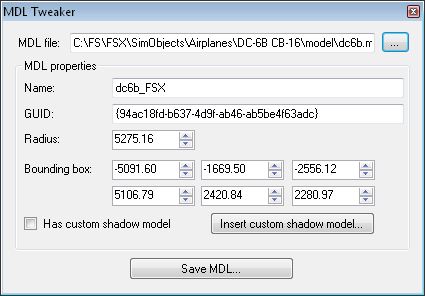
If not, open the MDL Tweaker in ModelConverterX by choosing Special Tools/MDL Tweaker. Click the ...
button and browse to your converted MDL file. Click Open.
If the numbers are close to the ones you saw in step 6,
you are done and can skip to step 14. You will probably never
have to worry about this again. If the numbers are huge
(100s or 1000s of meters), these need to be changed. The DC-6B
will probably not need to be changed:
We'll
make a final size calculation later, but for now enter the number that
is the next highest integer than the number found in step 6. If
you double click each number, just type in the new number and the minus
signs will stay where they need to be. It should look something
like this (I actually used 21 for all the numbers when creating this
tutorial because it's easier to type!). The numbers can be a few
higher, no problem.
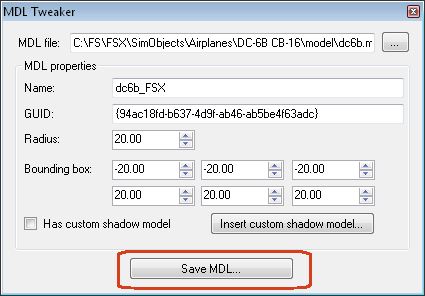
10.
Click the Save MDL button. Choose the MDL file you just
converted above. Click Save. Click Yes to overwrite the
original file. You can keep MDL Tweaker open in the background
for later use, if desired. Use the Windows taskbar to bring it
back. Skip to step 14.
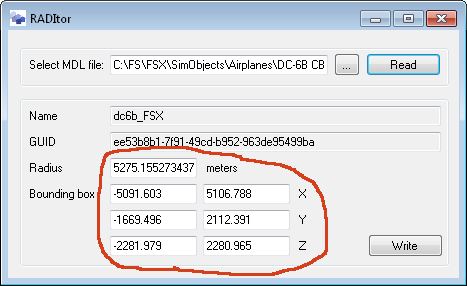
11. If you decided to use RADItor, start the RADItor program. Click the ... button and browse to your converted MDL file. Click Open.
12. Click the Read
button. If the numbers are close to the ones you saw in step 6,
you are done and can skip to step 14. You will probably never have to check this again. If the numbers are huge
(100s or 1000s of meters), these need to be changed. The DC-6B
will not need to be changed:
We'll
make a final size calculation later, but for now enter the number that
is the next highest integer than the number found in step 6. If
you double click each number, just type in the new number and the minus
signs will stay where they need to be. It should look something
like this (I actually used 21 for all the numbers creating this
tutorial because it's easier to type!). The numbers can be a few
higher, no problem.
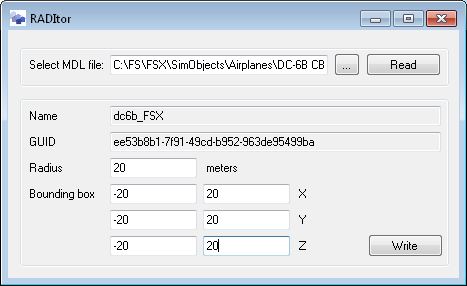
13. Click the Write
button. You can leave RADItor open in the background and use the
taskbar to bring it up when needed. For any further changes do
not Read again, just press the Write button if modifying the same MDL
name.
14. Load the plane into FSX or later sim. If you already have FS running and the plane loaded, do this:
a. Flights/Save Flight
b. Name it AAA or something simple near the top of the
list (I use AAA for testing many things) and click OK.
c. Flights/Load Flight - choose AAA and click OK.
d. The new MDL file version will be loaded.
e. Repeat step c each time you want to load a new MDL version.
15. Check the control surfaces, door, gear, and other animations. The props will spin, but not disappear.
16.
If you ever get a model displaying in FSX (or your sim) with
animated objects displaced (often to the center of the plane):
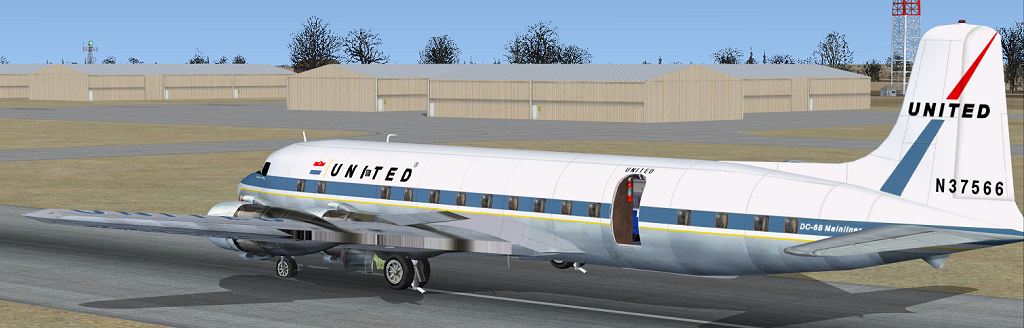
Try this - it's often worked for me:
a.
Import the model back into ModelConverterX. All objects
should be in their correct positions (if not, then this can't be fixed).
b. Choose Export Object back into the same MDL filename (overwrite). Use RADItor or MDL Tweaker if needed.
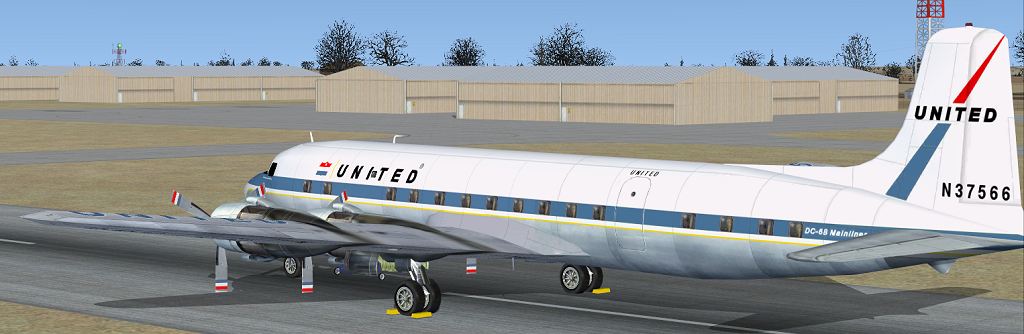
c.
Reload the MDL file in FSX as I described in step 14.
Hopefully the result is below.
d. If it didn't work, try a through c again. Try this up to 4 times. If it still didn't work, you will need to go back
to your backup MDL and repeat these steps.:
17.
In Windows Explorer/My Computer make a copy of the new MDL file
and paste it back into the folder. Rename it to the name plus -
FSX1 (for our first FSX conversion). In our example that would be dc6b - FSX1.mdl. This is a
backup so we can come back to this step if things go wrong later.
18.
At this point feel free in future steps to use Export Object to
generate a new MDL file (in this tutorial it is dc6b.mdl). We
have a backup
at this point so it would not be too bad to go back here and try again.
Remember to use MDL Tweaker or RADItor if needed, and if parts
are displaced
refer to step 16 above.
SETTING CUSTOM ANIMATION AND VISIBILITIES
19.
If you did not set all the custom visibilities in Part 3, Step 22, do it
now. Refer to Part 3, step 22 on the details of this process.
Our DC-6B example should have the custom visibilities set here.
ADDING VISIBILITIES TO THE STILL PROPS AND CHECKING THE PROP ROTATIONS
20. Open the Hierarchy Editor. Type in still
into the search box. The prop_still nodes should now be listed
there. Select all of them to highlight them and click the pencil
to go back to the full list. Your prop still nodes should still be
highlighted. Within those nodes, assign a visibility to all the
ModelParts within that node. The animation in a SceneGraphNode or ModelPart near the top of the
node should read prop0/1/2/3_still. Give the same
visibility condition to all the ModelParts below it. For example,
if a SceneGraphNode has an animation name of prop0_still, then all
ModelParts under that SceneGraphNode (and still within that node)
should receive a visibility condition of prop0_still. Remember,
only ModelParts get a Visibility Condition. NOTE:
Some of the ModelParts (or SceneGraphNodes) below the
SceneGraphNode with the prop_still animation may have other animations.
In the DC-6B, that animation is lever_prop_pitch for the prop
blade twisting. All these
ModelParts receive a prop_still visibility condition since we
want them to disappear at the appropriate RPM as well. The DC-6B has 4 ModelParts per prop.
21. Repeat step 20 until all still prop nodes have all ModelParts assigned a proper visibility.
22.
Check in FSX if your props are rotating in the correct direction.
If not, open the Hierarchy Editor, select a prop part as we did
above, and right click on the word Animation on the right. Choose
Reverse Animation. Repeat this for all props rotating the wrong
direction (still, slow, and blurred).
23. Export the plane as an FSX MDL file (or other format), then Import the plane back into MCX.
ASSIGNING PARTS WITH DIFFERENT ANIMATIONS IN FSX VS FS2004
24.
One more task, and that's to re-assign any parts that have a
different animation in FSX than they did in FS2004. An example of
this is the steerable nosewheel using the c_wheel animation definition.
The FS2004 SDK specifies it to be animated differently than the
FSX SDK does (see the Appendix for details if you are interested).
So open the Animation Editor and type in c_wheel in the Select Name Containing box and press the button.
Normally there will be only
one line, but I guess there could be more. Select c_wheel_FS9
from the drop down box to the right of the Assign Animation Type and click that button.
The c_wheel entries should change to c_wheel_FS9. (In the
DC-6B example aircraft there is one c_wheel line).
25. The other thing that needs to be changed are any water rudder animations. These are reversed in FSX from what it was in FS2004, so we need to reverse the animation to make them move correctly. Open the Hierarchy Editor and type in lever_water
in the search box. In the DC-6B two parts should appear (in this
case two SceneGraphNodes). Click on one of them, and then click
on the word Animation in the right panel. Then right click it, and choose Reverse Animation. Repeat this for any other parts listed.
26.
Some aircraft (some Manfred Jahn Connies and Jens Kristensen DCs,
for exampe) have the rudder animated in the wrong direction. It
should be deflected to the left when the animation slider is all the
way to the left. If needed follow the steps above to reverse the
animation, except search for rudder and find the rudder part(s) on the
vertical tail.
27. Export the plane as an FSX MDL file (or other format), then Import
the plane back into MCX. Check the plane in FSX or other sim and
make sure all animations and visible/invisible parts work properly. If not try the Export/Import again.
28.
In Windows Explorer/My Computer make a copy of the new MDL file
and paste it back into the folder. Rename it to the name plus -
FSX2 . In our example that would be dc6b - FSX2.mdl. This is a
backup so we can come back to this step if things go wrong later.
Next: PART SIX - EDITING MATERIALS AND TEXTURES