Repainting Tutorial Index
Creating a Layered PSD
(optional)
|
Repainting Tutorial Index Creating a Layered PSD |
Optional: Creating a Layered PSD File.
A handy thing to do is to create a layered .PSD image, to allow easier painting. If you are using a "paint kit", many will include layered images that can be manipulated in the same way. Thus, you can skip this step. Also, if you are only going to paint one or two schemes onto this aircraft, it's usually not worth the bother to create the complete layered files - you should only create the windows and door layers. However, if you plan on painting three or more versions it may save you time, depending on how hard it is to remove the existing paint scheme.
First, we'll select different parts of our texture and separate them into layers. Then we'll recreate the bare metal underneath the already painted areas. We won't be able to separate many things as cleanly as if we had the original layered files, but at least we can separate the "painted" parts from the bare metal.
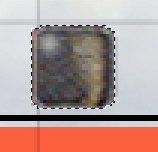
Open DXTBmp and use the File/Open menu to open your file from Part 1. Now choose Image/Send to Editor to send the texture to PSP (or just double click the image). It will appear as norm.bmp, since it is the "normal" part of the image. Then choose File/Save As in PSP, and browse to the original BMP texture file in your plane's Texture folder. Click it once. Open the drop down box at the bottom of the Save As dialog box, and select Photoshop (.psd). Now click OK. Our new PSD file looks like this:
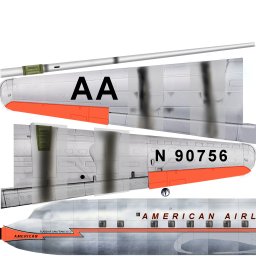 |
We are going to put the windows and doors into one layer, and the bare metal into another (lower) layer. This is always a good thing to do if you don't have a layered file to start with - makes painting much easier. If you are going to go all the way to bare metal, you should always choose the scheme with the most bare metal for this process. We are lucky that the American paint job has mostly bare metal. |
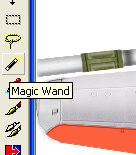 |
We are going to use the magic wand tool to help us select the windows and doors, so we can put them into a new layer. Click the Magic Wand tool icon in the Tools bar. This tool will allow you to click on a window (for example) and PSP will select all colors that are similar to the window, but avoid colors that are not "window". This will make selection easy. |
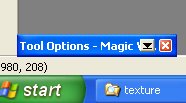 |
Now set the tool's Properties. Look at the bottom of the PSP window - there should be a box (or just a title bar) that says Tool Options. If it's not there press the Toggle Tool Bar Options button at the top of the screen. Move the mouse over the Tool Options title bar and it will open into a little window. |
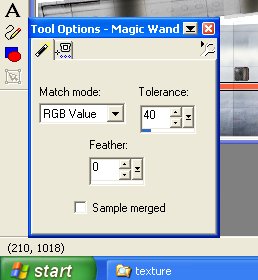 |
Now set the window as you see it here. During your work, if the tool is selecting extra things that are not "window" then reduce the Tolerance number. If it is picking up only a tiny part of the window, increase this number. I set it so it picks up 60-80% of the "window" with the first click. We'll get the rest in the next step. |
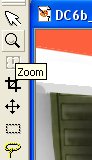 |
Now let's move in closer to the fuselage windows. Use the Zoom tool for this, or use the mouse wheel to zoom in and out. Click the tool's button, and then left click on a window. You will move closer. Continue to left click on the window until you are at a 3:1 zoom (displayed on the texture's title bar). If you move too close, click the window with the right mouse button. A fast way to get back to normal 1:1 zoom is to use the View/Normal Viewing (1:1) menu item. I've customized my toolbar to add that icon, since it's so handy. You can customize toolbars using the View/Toolbars menu. |
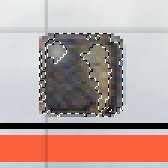 |
OK, click on the Magic Wand tool button again, and then click on one of the windows. It will look similar to the image at left. Now what? We need to extend the selection to the entire window. To extend selections hold down the Shift key while you click. ( To remove part of a selection hold down the Ctrl key while clicking.) OK, so hold down the Shift key and click the areas not yet selected. Keep watching to make sure that more than the window is not selected. If you suddenly see large areas outside the window get selected, press the UNDO button (curved arrow pointing to the left) in the top toolbar. You should be able to get the entire window selected. |
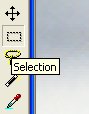 |
If you cannot get a few stray pixels of the window because they are too similar to the background colors, switch to the Selection tool. Set the Tool Options to Rectangle, with 0 Feather and Antialias unchecked. Now, holding down the Shift key, make small rectangles around those stray pixels and they will be selected. Selected too much? Hold down the Ctrl key and make a rectangle around the uneeded pixels. You may also have to zoom in a little more to do this whole process easily. |
 |
Keep at it until you have the entire window selected, as seen at left. Now, add all the other windows to this one already selected. Make sure you always hold down the Shift key when extending the selection, or you will lose what you've already selected! If that happen, press the UNDO button to get it back. |
 |
Your image should now look like this, with all the windows selected. If there are any doors in your texture, you should select them as well. |
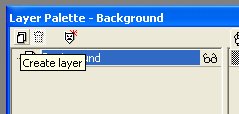 |
We have to create a new layer in this image to place our windows and doors, so open the Layer Palette, which is usually located in the bottom right corner. If it's not there, click the Toggle Layer Palette button in the top toolbar. Move over the title bar and the window should open up. Press the Create Layer button. Give it the name Windows and click OK. |
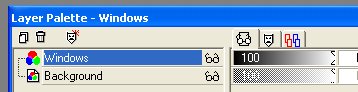 |
The Layer Palette will be used quite a bit in this tutorial. You will be editing only one layer at a time (unless Use Merged Layers is an option for that tool), and the current layer is the highlighted one. Thus we would be working on the Windows layer in this pic (which, remember, is completely empty at this point). The eyeglasses to the right of the name turn the display of the layer on and off. This is handy when you have more than one paint scheme in the same PSD file - turn off the American layer and turn on the United Repaint layer and the image will switch from one airline to the other! The 100 to the right of the eyeglasses is the opacity of the layer. This is used when you have layers like rivets and panel lines that should be very subtle - draw them boldly, and then reduce the opacity of those layers until they are as faint as you want them. This also is used when creating night lighting in a later part. |
|
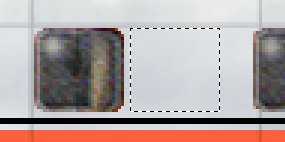
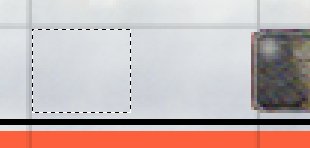
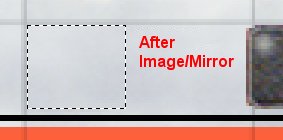
Click on Background in the Layer Palette to make it current (it has our selected windows and doors in it) and then choose Edit/Copy to copy our selection to the clipboard. Now click Windows in the Layer Palette and choose Edit/Paste as New Selection. We now have our windows and doors in the Windows layer. Move the mouse until the new windows are exactly aligned with the originals. Now click the mouse to "anchor" the windows at that spot. If you are only creating a Windows layer, you are done since we have the windows and doors in a separate layer. Save the PSD file and go back to Part 2 . When painting in Part 2 don't worry about covering up the windows in the Background layer - they have already been duplicated in the Windows layer. PS. Another way to do this is to copy the windows, and then use Edit/Paste as New Layer. Move the windows into position and click to anchor them. Then rename the layer by right clicking on the layer name in the Layer Palette and choosing Rename. You can drag this Windows layer up and down the layers listing if you need to. If you are going all the way to bare metal we now need to remove the now useless windows from the Background layer .Click on the eyeglasses next to the Windows layer name, and then click on Background. Choose the Selection tool (dotted rectangle) and select an area right next to the first window (see left). Choose Edit/Copy. Now choose Edit/Paste/As New Selection. The rectangle we selected will now appear on top of the image, and can be moved around with the mouse. Move it over the first window until it's neatly hidden. Click the left mouse button. Now it's "stuck" or anchored in place. You can still move it by dragging with the mouse, though. It may help to "blend in" if you choose Image/Mirror (if you moved the rectangle horizontally) or Image/Flip (if you moved the rectangle vertically) since this will match the pixels at the edge of our square and the original image. |
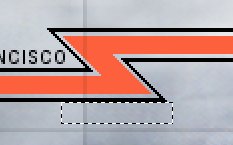  |
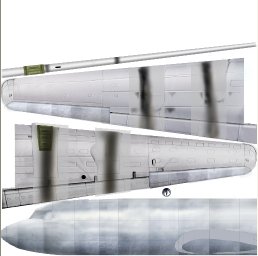
We also have to remove the American paint from this image, and we do it exactly the same way. Select some bare metal that looks like it matches the area to be covered. Choose Edit/Copy and Edit/Paste/As New Selection the selected rectangle, move it into place and click it, then use Image Flip (as in this case) or Image/Mirror if needed.
|
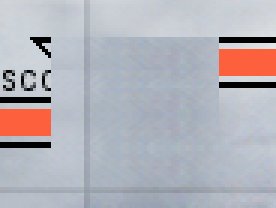  |
If there are any areas that don't match well, first remove the selection dotted lines by choosing Selections/Select None. Select the Retouch tool (white gloved hand) and in Tool Options' middle tab set it to Smudge. In the left tab set the properties of the smudge - round, size 25 and hardness 0 is a good start. Play with the other options too. Drag the mouse from just outside the areas than don't match into those unmatching areas. In this example, I dragged the mouse from just above the dark square area at the top, down into the dark area. This smudged the lighter colors into the dark rectangle, smoothing and eliminating it. You probably wouldn't do this until you have removed all of the American paint, though. |
 |
When you are finished, the image should look something like this. When you click the eyeglasses in the Windows layer in the Layer Palette the windows should appear. Save this PSD file for later use.
|
Let's move on to Part 2 - Painting the Aircraft